photo blogban1_zps06115c64.jpg photo blogban2_zps25145b56.jpg photo blogban3_zps43f8c62d.jpg photo blogban4_zpsbe83ebd7.jpg photo blogban5_zps7c892585.jpg photo blogban6_zpsad9ba9e2.jpg
Showing posts with label DIY. Show all posts

3/10/2014

DIY Scarf Hanger

If you have 5 scarves or 20 scarves, you can make this scarf hanger work for you. 
All you need is some dresser drawer handles, wood, screws, and something to cut the wood!
I don't have any pictures while I was making it but it's so easy I can just explain it to you!
So my wood came from some old fence wood from my boyfriends farm, you can always buy or get some recycled cheap wood from any store. You can always try your local Habitat For Humanity ReStore! 

I made each of my boards 2 feet long and the width is around 3 inches. To keep them all together I cut 2 more boards skinnier in length but I made them a little less than 9 inches. So they could go across all three boards and hold them together. Put a screw in each board on each side to make sure its pretty strong. Also at this point you want to add your hanger. I used a really strong wire, but you can always buy the saw tooth hangers, just make sure you get something that's strong enough. 
You want to drill holes before you try to put in your drawer handles. Its about impossible or at least it was for me to put those in without holes. 
This is my finished piece, I staggered my boards for more room and different ways to hang my scarves. I also painted mine, you can paint it any color!

Here's my finished product ! It only took around 30 minutes to complete, I hope you try out this quick and easy DIY. :D
Nicky

11/13/2013

REMAKE: Juniper's House Shelf


Starting a new series on the blog showing projects that I redo since they aren't essentially diy more like made over.

I found this little wooden house shelf a little while back for 50 cents at a thrift store. I immediately knew I wanted it for Juni's room but It needed to be different.

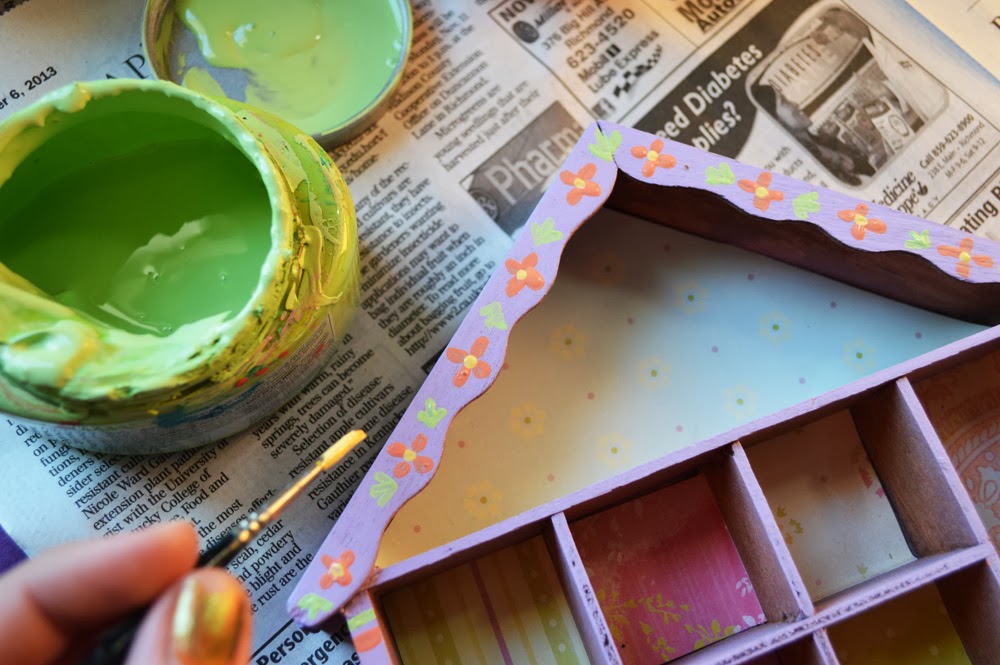
 This is a pretty simple remake. I chose to paint it light purple with spray paint and then my mom gave me the idea of putting little "wallpaper" in the backs of each little room so I used scrap book paper for that. I didn't glue it in I just made it fit snug. Then I added some painted details and that was it!

I loved the way it came out! PS my sweet older sister thrifted the plastic bee decor for 50 cents!

:) 

10/19/2013

Tips and Tricks for Spray Painting Almost Anything


A good can of spray paint can transform almost anything into something a lot more interesting. It can revive the unwanted "ugly" thrifty finds laying around your home into one of a kind decor that will make others envious.

I started spray painting things a year ago and in that year I learned a lot through trial and error. It really isn't as easy as it looks. You can easily mess up your project and cause yourself to do a lot more work to fix things that could have been easily been avoided.

You literally can't just pull out a can of spray paint, spray your project and expect it to come out looking good. So I am here to help! To share the mistakes I learned from so you can master the art of spray painting!

Here are my tips and tricks...

1. Clean your Object your Spray Painting: Your thrift find probably has a layer of scum on it.... no joke! That layer keeps spray paint from sticking and can effect the way the spray paint coats your project! Also any dust particles or hair can make your spray paint layer look crummy and bumpy.

2. Let your Object Dry After Cleaning it before Spray Painting: One droplet of water will make your spray paint uneven and cause the paint around the droplet to crack and peel. It's the perfect way to ruin a project and make it unfixable.

3. Buy a Expensive can of Spray Paint: I really can't express this enough because when you skimp and buy the cheap can you end up spending way more buying more cans to get a good layer. When you could have bought one can that is easier to use and has a more brilliant color. I like the spray paint that primes and paints or applies 2 coats in one coat. IT IS WORTH IT.

4. Scratch the Surface Before Painting: I am not always patient enough for this step but when it comes to certain projects it is a must to keep your paint intact for years to come. For example I bought a really cool pair of old wire yard chairs that were covered in a paint that had rusted. I made sure to sand the old rust and paint of completely before painting and over 2 years later they still look like new again. Sanding provides a grip on plastic surfaces.

5. Protect Yourself and Your Crafting Area: Try to spray paint outside or in a well ventilated area like an open garage. Be sure to cover your area with news paper or something to protect it from the residue that floats in the air during and after spraying. Wear old clothes and use a bandanna or ventilator to cover your mouth. Also goggles and gloves can be helpful to further protect yourself.

6. Buy More than you Think: Buy an extra can of spray paint. There is nothing like starting a project and getting frustrated because you ran out of paint. You always need a lot more than you think. Plus that extra can if not used could come in handy on another project.

7. SHAKE WELL BEFORE, DURING, AND WHEN YOUR DONE:  This is SUPER IMPORTANT because shaking only before like the can tells you is not enough to insure a perfect pretty covering. You need to shake between layers and when your done turn the can upside down, shake and spray to keep your spout from clogging for future painting.

8. Layers, Layers and more layers: When spraying be sure to only do thin layers that go across your project at an even speed starting from the top and working toward the bottom. Then step away and in a few minutes come back, shake your can well, and do it again. I like to do at least 4 layers, one for each side.  It pays to be patient and to spray in a different direction each time to insure complete coverage. Not spraying is thin layers results in running paint, uneven coats, and a long time before your project dries completely.

9. Allow the paint to Dry for a couple Hours before Handling: Otherwise you make find yourself in a sticky mess with a ruined project. Also projects can hold fumes for awhile.

10. Matte vs Gloss it Makes a Difference: Depending on what your spray painting and what your looking to achieve be sure to check the spray paint can before buying for either Matte which produces a flat color finish or gloss which will make your project shiny! I can't tell you how many times I bought spray paint and forgot to look at this and was disappointed with the effect I got.


9/03/2013

DIY Tree Hugger Baby Top


  I got a bunch of these long sleeved baby tops from the hospital after Juniper was born and wanted to toss them until I figured out why I hated them so much. They were tooo plain! So I pulled out some potatoes, a knife, some fabric paint and decided to experiment with old fashioned potato printing!


Step one: cut your potatoes in half, set one half to the side (this is your paw) and in the other half cut out a simple triangle and then a smaller triange inside that touches the bottom to make the letter V. You should have three rectangle pieces left from cutting the triangle that we will use for the trunk of the tree.
Step 2: Mix your paint. If you bought the primary colors, red blue and yellow. Yellow + Blue = Green and a little bit of all your colors will make a nice brown. Plus this saves some money on fabric paint!


Step 3: Use the round half of the potato to print the large pad of the paw and use the end of a small cork or pencil to print the fingers of the paw. (I used a cork stuck into a pin tool)  Don't forget to put a paw on each hand.
Step 4: Use your V stamp with green fabric paint and stamp the center (near the top of your shirt)
Step 6: Repeat underneath
Step 7: Repeat Step 5 and 6 on both sides of the original V print and then use a slice of the potato to print a brown trunk to each tree top!
Step 8: Use a small paint brush to add the word "hugger" below :)


And there you have it... my little tree hugger. God love it!

5/16/2013

DIY GEOMETRIC KICKS


I got these kicks which look so similar to expensive Toms at the doller store for $6 dollars. I also found the tulip fabric paint in matte white on sale at Micheals for $4 dollars. So this project literally cost me 10 dollars with fabric paint to spare!!

It's always a little nerve wrecking trying to begin a project on a blank canvas but once I got over the fear it seemed to go smoothly. I also recommend watering down your paint a little so it applies smoothly and doing a few coats. :)


5/03/2013

DIY RAINBOW HAIR CHALKED TIPS


 You see hair chalking everywhere! The good thing about it for us preggos is that it gives us the excitement of coloring our hair without harsh chemicals that could be harmful to our pregnancy! Hair chalking was one of the items on my Spring Bucket List and I am so glad I finally tried it! I love the results.


There are tons of tutorials on how to hair chalk... but what make this one special is that I learned a lot of tips from trying this to make it easier for you. Things that other tutorials didn't specify.

Supplies: A spray bottle full of water, straightening iron or curling iron or blow dryer or all three, soft chalk pastels (art store)

My hair type is naturally severe curls... I almost always straighten it and I wash it every other day to keep it from drying out. I have also not dyed my hair since I found out I was preggo.. so my roots are long.

STEP ONE: Pick out sections of your hair you want colored.
TIP: TAKE THIS PROJECT OUTSIDE IT CAN GET MESSY!

STEP TWO: Soak the strand of hair with spray bottle.

STEP THREE: Rub pastel on the wet strand in a downward stroke.
TIP: CHEAP PASTEL CHALK DOES NOT WORK, I had 3 different sets of chalk that I use for pastel chalk drawing and the slightly more expensive set was wonderful. The cheap set from Walmart did not work.
STEP FOUR: Use straightener iron to dry hair.
TIP: Don't pull strand through hair it removes some of the color instead close and reopen the flat iron in sections of strand. I also found that it was better to go ahead and use a curling iron instead of a flat iron if I was wanting curls.
TIP: The chalk left me wanting to brush my hair but believe me... DON'T BRUSH IT!  The chalk will just lighten and disappear!
It also made my hair feel really thick however I really enjoyed it. I think hair chalking works great for when you just want something different for a day or two. Like a game night or party or festival or a fun photo shoot!

I can't wait to show you the photo shoot we took with our hair chalked for the Festival Collection that will be in the shop this weekend!
Have a wonderful Friday! Check back Monday for a week full of fantastic posts I have planed!!


4/30/2013

DIY REDO Old Suitcase to Shelf Display


One of my favorite things to do before a festival is to design the displays. I always dreamed of having my own shop one day with big windows where I could decorate for each season. This year I knew I had to pack light so the big shelving I used before was not going to work. I have used suitcases before to display things but this time I really wanted to make them super useful. As a display and a way to carry stuff.

I bought this set of old smelly suitcases for 3 dollars last year at a thrift shop. I wanted to try to use them as a make shift festival table but I soon realized that the moisture on the ground was ruining them even more. Also I couldn't store anything in them because the smell just wouldn't go away. This year I realized they either needed to go or they need a huge overhaul and then I remembered a long time ago seeing the Skunkboy Blog make the cutest suitcase into a shelf... gosh I just love this lady so creative!

INSPIRATION...
via skunkboy blog
So I decided to make one myself to display terrariums and necklaces!!!

STEP ONE: The old suitcase was super easy to gut I just used my hands to completely remove the insides.
STEP TWO: I then sealed with some white gesso which removed what was left of the smell and I am hoping keeps the outer case shell from warping if it gets wet.
STEP THREE: I then had my dad help me by gluing in the cork on the shallow side and screwing wood shelves on the deeper end.
STEP FOUR: Finally I decorated :)
PS I also glues stones on tacs to use to hang necklaces :)

I really enjoyed this project and it wasn't as hard as I thought it was going to be! I still want to decorate the inside of the smaller case with patterns and such. I also want to paint something on the outside of the cases. They also worked great for my festival display. Probably one of my all time favorite display!

What do you think?

4/09/2013

DIY Pine Cone Flower Crown

Pine cones aren't just for fall anymore! Here is a fun way to use those old scented pine cones from christmas and create something uniquely spring!
I have seen flower crowns done in so many ways... it leaves you thinking can there be another way to make one? That was a challenge for myself and the inspiration was an old folk craft book that had a project for kids where they painted pine cones. Then walla... out came this diy project that I really enjoyed! 
 Supplies needed: Paint, scissors, paint brush, pine cones, wire cutters, floral wire (covered in raffia), glue gun
 Pick a variety of different sized pinecones and slice them in half. For bigger thicker pin cones you may want to use a hand saw to get the job done but wire cutters work fine too.
 Once you have cut your pine cones lay them out and see which sides look best. Use the wire cutters to trim and shaped the top parts of the cone.
Have fun painting your pine cones. Use several colors on each cone.
 Use your floral wire to create a ring that will be slightly smaller than your head. Twist around several layers of wire to create a nice base for pine cones to be glued on.
 Spread the wire to form wider bases for where you want your pine cones to lay.
 Use the hot glue gun to attach each pine cone flower to the halo.
 Don't think you would ever use a flower crown? Use this idea of making pine cone flowers for a spring wreath, magnets, brooch, or glue them to a board to mark a folksy piece of art!!
 I also glued in some spiral twigs and painted tiny pine cones green to make leaves.


Do you like?? What would you use the pine cone flowers for?

PS if you love natural beauty products then you better not miss your chance at this giveaway!