


Yeah! I have been waiting to do these suckers for about a month! It took that long to get the studs I ordered online (crazyness)! I didn't think I would ever get them... so here it goes!!! Yeeee!
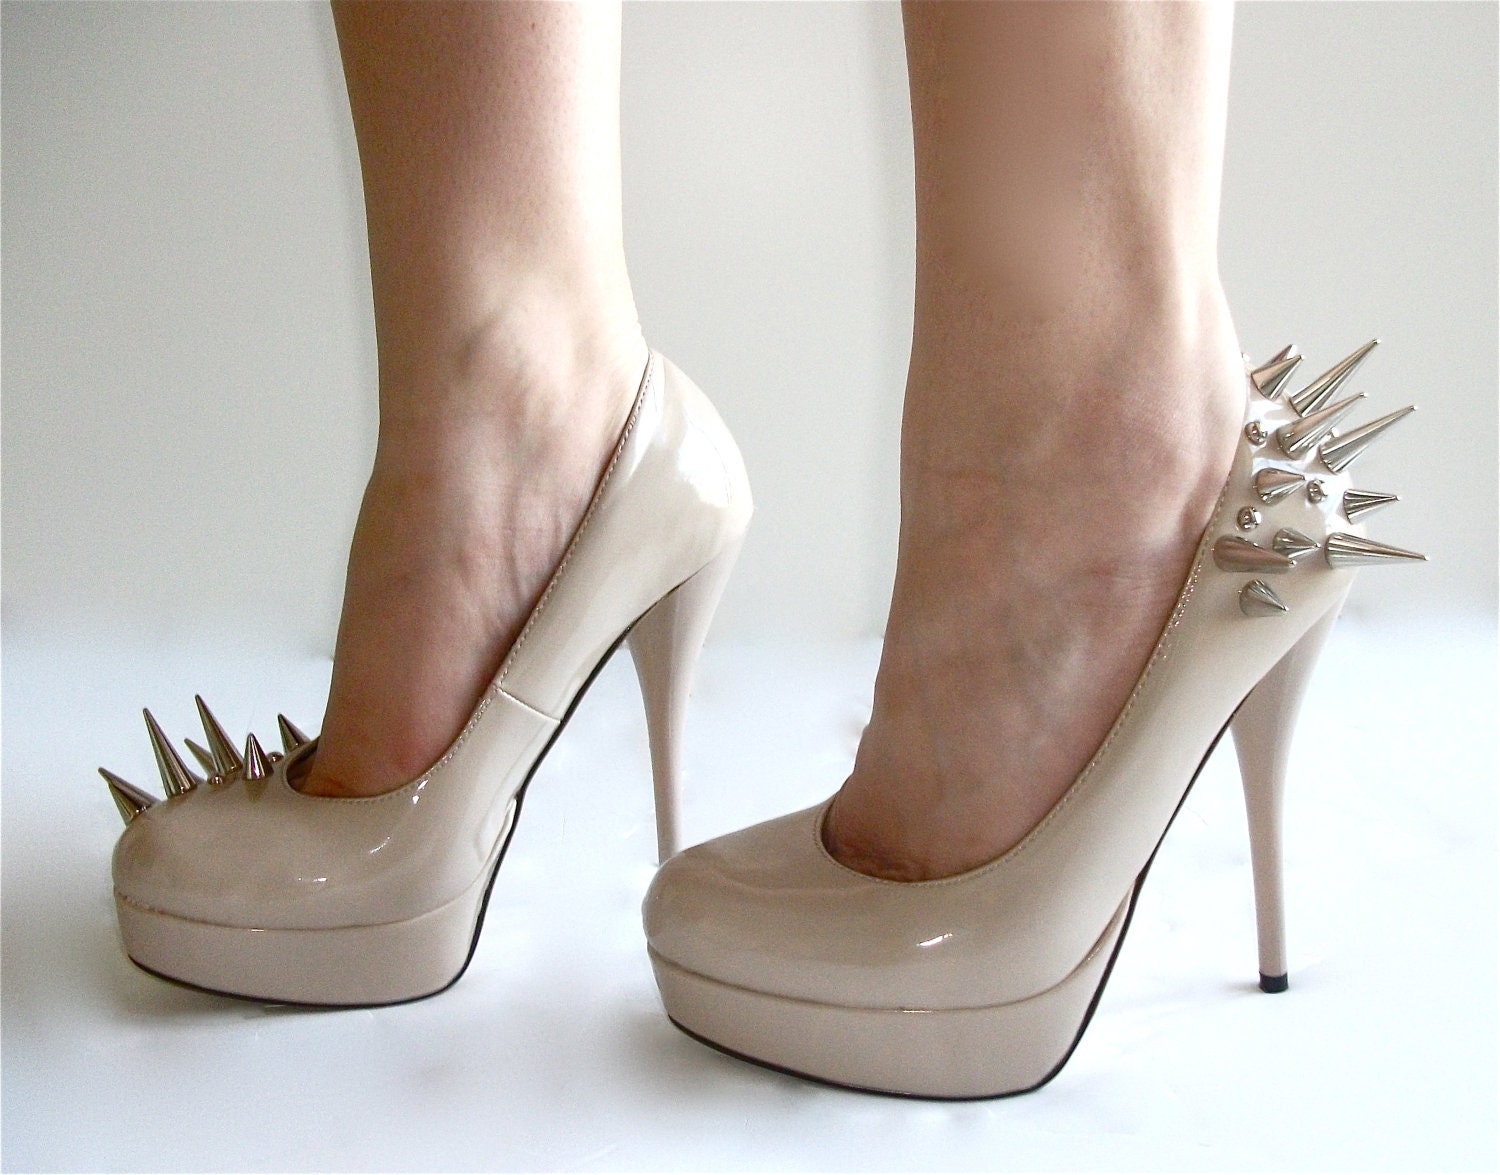 |
Asymmetrical Spiked Patent Leather Pumps by VileBroccoliFur |
So I was inspired by these and a lot of other pretties on etsy for sale but was crushed by the price. At 100 dollars more or less a pair I could not afford them. So I did a little investigating and found silver studs online for around $16.00. That was for 3 different heights like I wanted and about 10 of each. I also found this cute pair of new black lace peep toe heels from a thrift store in town for $10 dollars. So my total cost was $26... not bad until I experienced the bit of work it takes to put them together.

The really sharp pointed studs are screw backs which are what I suggest purchasing instead of the little rivet style kind. I got both kinds and found the rivet ones do not stay on. I had to glue them. Plus they will poke your feet if you don't cover them with something

Next I collected a variety of tools... You will definitely need a flat head screw driver for screw back studs and the metal pick tool in the middle was a must! The hammer I tried to use but wasn't so necessary.

Next I collected some helpful tools. The tack worked best. The chalk was handy. The screw and needle not soo much.

I started by using the tack to punch a beginning hole into the side of the back of the heel. Note I did think about how I would place the studs before beginning and organized the studs in piles to make sure I had an even amount for each heel.

Then I started to punch the pick tool through the hole while wiggling it to make the hole wider.

I inserted the screw back part of the stud as much as I could....

and used the flat head to finish turning it through the hole.

See :)

I screwed the top cone shaped metal stud on easy peasy!

Then tightened it with the flat head screw driver.

This took about an hour... and when I was finished with one heel I put it next to the other to match up where the studs were placed. I used the chalk to mark those spots and finished using the studs.

And tada!!! Killer heels! Those poor army men... they don't know what hit them!
Hope you enjoyed this as much as I did!

I love new friends!!! Run with me so you can see all the other cool things I create and GET INSPIRED!
JOIN THE BLOG FOR FUN AND CRAZY GIVEAWAYS... REALLY GREAT STUFF COMING IN APRIL!
Follow My Blog
THANKS!
oh yes, killer heels indeed! i love them and that last photo is awesome!
ReplyDeleteWhere can I order these studs from ?
ReplyDelete