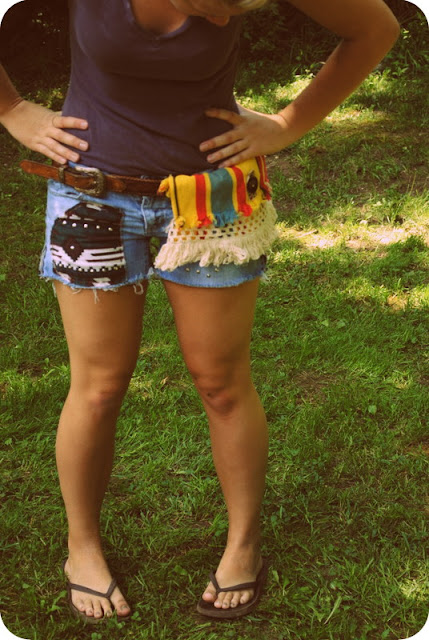
I was inspired to make this pouch because when I do festivals I need a place to keep money and trinkets I purchase. My sister actually made me a really nice money pouch a while back but it ties in the back and always sags and comes loose. The belt is sure to keep you pouch on you at all times!
This pouch is great for hiking or long walks especially if your like me and can't hold on to a purse for the life of me.
GATHER MATERIALS:
Old belt: I got mine from goodwill for 1.00
Fabric Place mat: I got this from goodwill too... 50 cents but you could use any scrap fabric
Scissors
Old trim, ribbon or embellishments
Button
Floss
Needle
Hot glue gun
Start by placing the belt on the piece of fabric so that you can create a pocket. My first mistake was putting the belt upside down. It should be facing up instead.
Next you can fold you fabric to see the placement. Be sure to allow a little to overlap the top of the belt.
I then went ahead and attached a button for closure. (this step can be done at anytime)
I doubled knotted it in the back and added some glue for extra security.
Now to stitch up the sides of the pockets. I started the needle from the inside so I could hide the knot inside the pouch.
And just stitch all the way up!
When I came to the belt I didn't stitch into it I just stitched through the fabric on top and then finished stitching the top when I passed the belt. So essentially your belt will slide in and out. The good thing about this is that you can wash your pouch or if your like me and you put the belt upside down you can now fix it.
This is how it looks one finished side... now for the other...
This picture helps you see how I didn't stitch into the belt I just stitched the fabric.
Finishing the top...
Then I folded the top flap over and cut a hole big enough for the button.
Added some hot glue to keep it from fraying
and placed two pieces of ribbon to finish the button hole.
See how neat?!?
Then I added some vintage trim I had laying around...
Make sure you don't stitch the pouch closed when adding this! I almost did that!
and wallllaaaa! I really love it and it made me feel a lot better taking the time out of my day to make this and just chill!
Yippeee!!!
So what do you think?


LOVE LOVE LOVE THIS DIY!!!! How clever, chica!! I love it!! Gonna have to make one myself :)
ReplyDeleteUM, I love this! I'm actually going to a music festival this weekend and might have to make me one!! Clever, clever ;)
ReplyDeleteThanks lovelies! I would love to see what you all come up with :D
ReplyDeleteawesome idea to use the ribbon around the button hole. this is adorable!
ReplyDeletelove this! i made something similar-ish over the summer :)
ReplyDeletelove the fabric you used :)
What a lovely idea! Thank you for the inspiration on a rainy afternoon!
ReplyDelete